STEP 1:
PLUG-IN YOUR GPS TRACKER
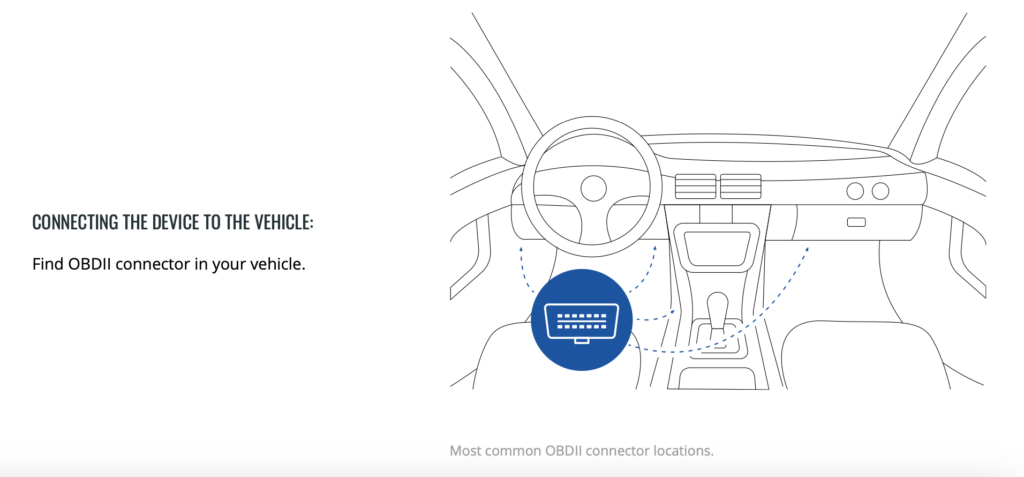
LOCATE THE OBD-II PORT
The FMC003 GPS tracker is designed to plug directly into your vehicle’s OBD-II (On-Board Diagnostics) port. This port is typically located within easy reach of the driver’s seat, and here are some common areas where you might find it:
-
Under the Dashboard: Most commonly, the OBD-II port is found under the dashboard on the driver’s side, just above the pedals.
-
Near the Steering Column: It might also be located close to the steering column, sometimes under a small cover that you can flip open.
-
In the Center Console: Some vehicles have the OBD-II port hidden in the center console, especially those with a more integrated interior design.
-
Under the Glove Compartment: Another common location is under or near the glove compartment on the passenger’s side.
PLUG IN THE FMC003 TRACKER
Once you’ve located the OBD-II port, simply plug in the FMC003 tracker. The device is designed for a snug fit, and no additional tools are needed.
ENSURE A SECURE CONNECTION
Make sure the tracker is securely connected to the OBD-II port. You should see a light on the device indicating that it’s powered on.
COMMON LOCATIONS FOR THE OBD-II PORT BY VEHICLE TYPE
- Sedans and Coupes: Usually under the dashboard near the driver’s knees.
- SUVs and Crossovers: Often found under the steering wheel or close to the center console.
- Trucks and Vans: Typically under the dashboard on the driver’s side, sometimes near the door frame.
If you’re having trouble finding the OBD-II port, you can easily look up the specific location for your vehicle’s make and model online. You’ll likely find helpful images or videos that guide you directly to the port’s location in your car or vehicle.
STEP 2:
GET ACCESS TO THE XTRACK APPLICATION
- Visit: https://xtrackapp.com/registration/create

- Register your account.
- Check your email for your login credentials.
- Sign in at https://xtrackapp.com, using your email and the password provided.
- Select your preferred plan and complete the payment.
- Gain instant access to the XTRACK system.
Step 3:
START TRACKING
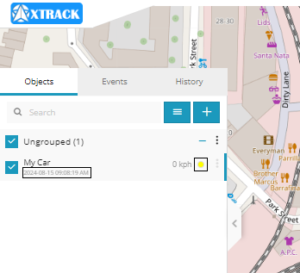
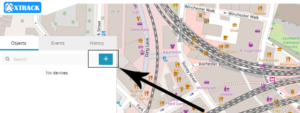
- Add a New Device: On the left panel, navigate to the “Devices” tab and click the “+” icon.
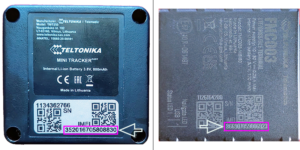
- Enter Device Details: A new popup will appear. Choose a name for your device and enter its IMEI number, which is located on a sticker/printed on the device.
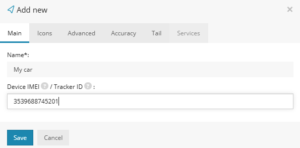
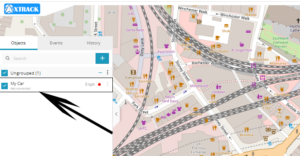
- Save the Device: After filling in the details, click “Save.” The device will then appear in your device list.
- Automatic Configuration: Your device comes preconfigured and will automatically connect to the XTRACK server. Please allow a few minutes for the server to receive the first data packet from your device.